Importing the Unity Package:
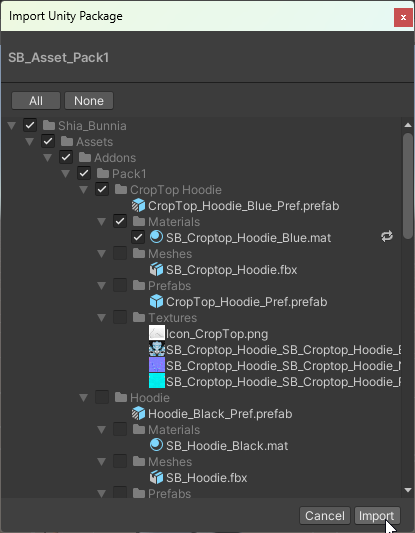
Import your Unity Package into the scene by Double Clicking Shia_Bunnia.unitypackage An import window will appear. Click Import.

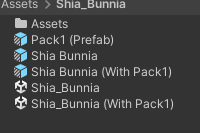
After importing the Unity Package you will find all the files related to the character under the folder Shia_Bunnia

Either open the Unity Scene File (White Icon) by double clicking it, or drag and drop the Prefab (Blue Icon) into your existing Unity Scene.
Avatar Descriptor
The avatar descriptor intentionally has the Blink, Playable Layers, Menu and Parameters left blank! These are added via a VRCFury script separately so you can add your own layers here!

The Blink is controlled by a custom blink controller and should not be added unless you remove the custom controller entirely.
Selecting A Hairstyle:
Before Uploading
This avatar is ALMOST Ready to Upload,
For Performance reasons the hair options for the avatar have to be chosen before upload. There is no menu to enable or disable each hair in game. (This is intentional)
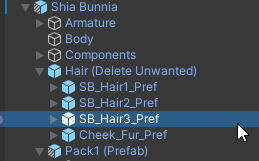
Navigate under the Characters Hierarchy Shia Bunnia > Hair to select a hairstyle.

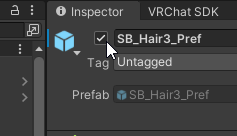
By default, all Hairstyles are Enabled. Using the checkbox in the “Inspector” menu, toggle between the different hairstyles.

Important!
Toggling off the hairstyles will still upload them! To not affect performance rank, you will need to remove the disabled hairstyles from the avatar by Deleting the Prefab or adding a VRCFury Component to delete on upload
Don’t worry! All of the hairstyles are still available in the Prefab “Shia Bunnia” and under the
Assetsfolder. Just drag and drop the prefab “Shia Bunnia” into your scene again, or if that has been edited, drag and drop the prefab from theAssets/Addons/Base/Hairfolder directly onto your characters hierarchy.
Next
Once you’re ready to upload, Visit Uploading Your Avatar if you need help. Otherwise check out FAQ
