PC Projects
If you have set your avatar up for PC and want to upload for quest, Create a NEW project!
Uploading for quest requires you to modify and remove a lot of things like materials and constraints. This should NOT be done in a PC project.
If you are just uploading to quest, continue below.
Avatar Functions
Most of everything will work as expected on the quest version of the model. But some things such as
Rotation Constraintscan NOT be uploaded to quest.This means that your Elbows, Knees and Butt will not deform as well as on PC.
Avatar Descriptor
The avatar descriptor intentionally has the
Blink,Playable Layers,MenuandParametersleft blank! These are added via a VRCFury script separately so you can add your own layers here!

The
Blinkis controlled by a custom blink controller and should not be added unless you remove the custom controller entirely.
Setting Build Target:
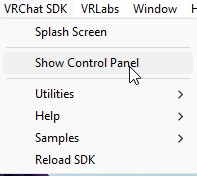
Navigate up to the VRChat SDK tab in the top of your unity window and select Show Control Panel
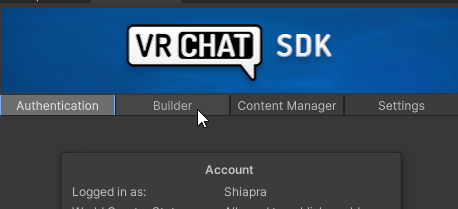
Log into your VRChat Account and Navigate to the Builder Tab
Note
If you’ve just created a VRChat account or are relatively new to VRChat, you will not be able to upload an avatar. This is a limitation VRChat imposes.
If you see “Able to Publish Avatars” you should be good
You will need to set your build target to android for quest. Click on the build target menu and select android. You will be prompted to reconfigure your project which will take a while.
Once the build target is switched you will see the VRChat SDK has some issues with your project.
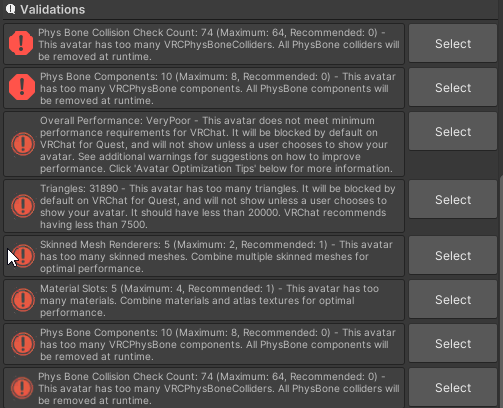
This is where you will need to remove some further stuff. Your limitations are:
2 Mesh Renderers4 Material Slots8 Physbone Components64 Physbone Collision Checks
Our first Mesh Renderer and Material will come from the Body Mesh
Selecting A Hairstyle or Cheek Fluff:
Before Uploading
This avatar is ALMOST Ready to Upload,
For Performance reasons you will need to choose either one of the three Hairstyles or the Cheek Fluffs to upload. Delete all but the one you wish to upload.
You can alternatively remove them all. If you do and you own the clothing pack, you might be able to upload one pair of clothes, but depending on the garment, you will likely have to remove the Physbone scripts
Navigate under the Characters Hierarchy Shia Bunnia > Hair to select a hairstyle.
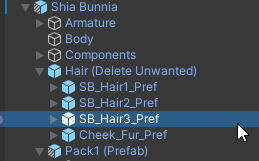
By default, all Hairstyles and Cheek Fluffs are Enabled. Using the checkbox in the “Inspector” menu, toggle between them.
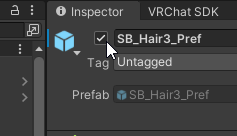
Once you have made your decision, Delete the objects you have turned off.
Important
Toggling off objects will still upload them! You will need to remove the disabled objects from the avatar by Deleting their Prefabs from your scene.
Don’t worry! All of the hairstyles are still available in the Prefab “Shia Bunnia” and under the
Assetsfolder. Just drag and drop the prefab “Shia Bunnia” into your scene again, or if that has been edited, drag and drop the prefab from theAssets/Addons/Base/Hairfolder directly onto your characters hierarchy.
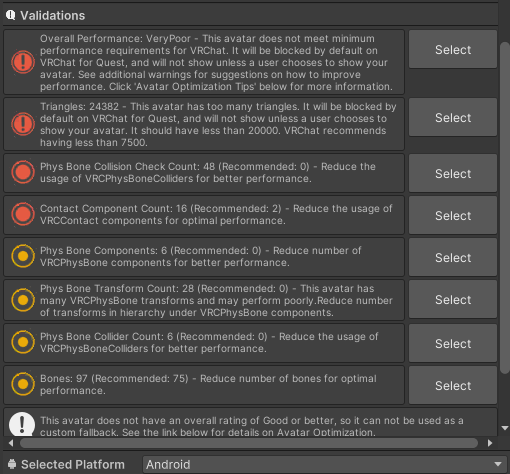
Your Validations tab will now look something like this:
Converting Materials To Quest Shader:
The VRChat SDK will not allow you to upload materials with the Poiyomi shader, you will need to select each of the materials for your avatar and change the shader to VRChat > Mobile`
Uploading:
Please Note
If you are uploading a quest version to the same avatar, so users who are on quest can see you. Make sure to copy your avatarID into the
Pipeline Managerscript on the root prefabShia Bunnia
Your avatar will be hidden by default on quest, and people will need to manually show your avatar.
Once you’re ready to upload, Check the box under “Online Publishing” and Click Upload

Congratulations! You’ve uploaded your avatar and can go hop around in VRChat!
Next
Visit the FAQ


